Requirements:
- Computer with an SD slot for burning the image. You will need root privileges on this device.
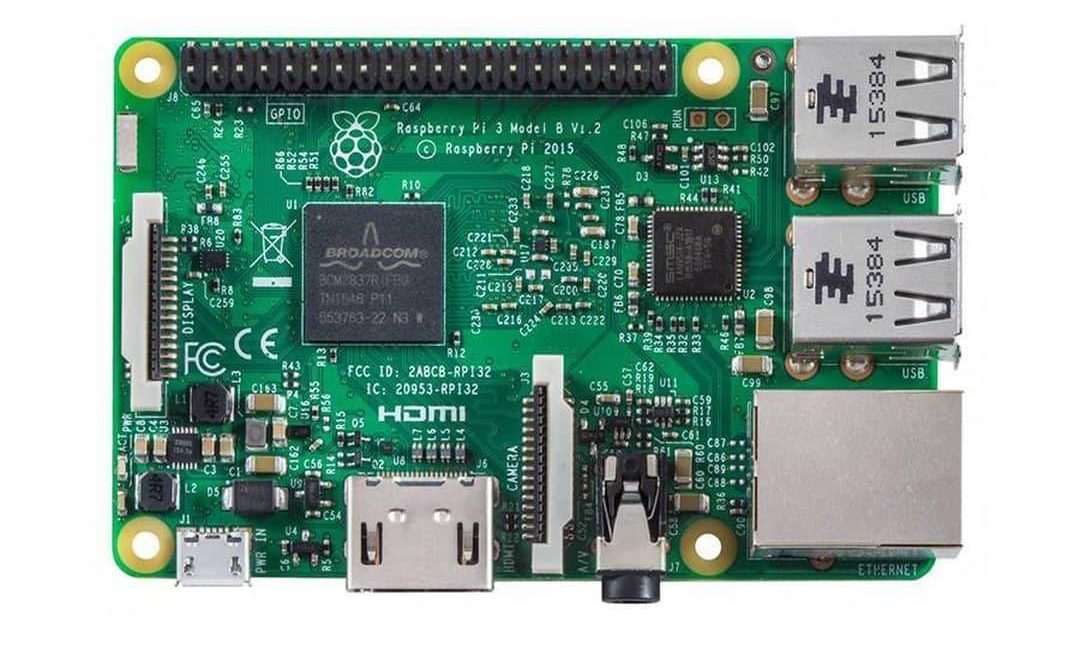
- Raspberry Pi B, Raspberry Pi 2, or Raspberry Pi 3
- A blank SD or Micro SD (Raspberry Pi 2) card.
- Windows users will need to download the latest version of Image Writer for Windows.
- For booting the Raspberry Pi: A monitor with an HDMI cable, USB keyboard, micro USB power source (5V recommended).
Step 1: Installing the FreeBSD image for Raspberry Pi
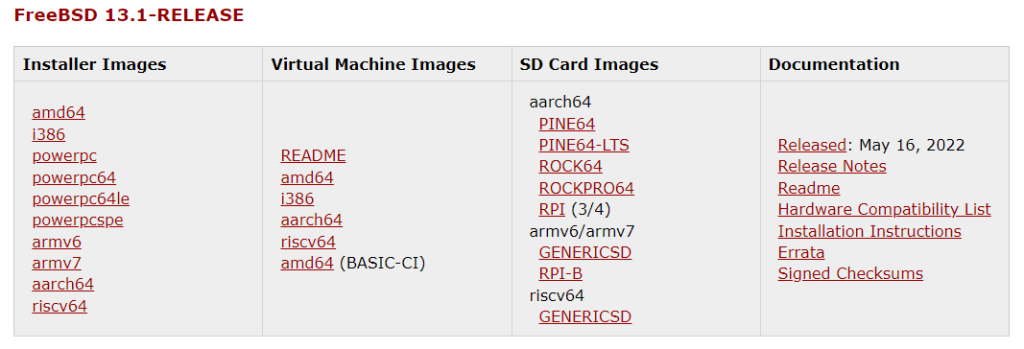
Visit the FreeBSD release page, found here. This should be done on the computer you are using to burn the image. Select the download link for the type and class of Raspberry Pi you will be using. Once the file has been downloaded, it will be in a .xz format. A decompression tool, such as winzip, may be needed to export the file into the .img format.
Step 2: Writing the Image File using dd
When using an SD card, an extra step will need to be made as simply copying the file will not work with .img files. This is where the dd command comes in (Image Writer for Windows users).
- On Mac/Linux open up the Terminal, located in applications or utilities depending on your OS.
- Enter the following commands. I’ve included the explanation of the command on the right. Only enter the command line:
Warning: This example uses /dev/disk2, replace it with your disk location.
sudo su
Logs the user into the Super User (root) environment. On Mac you may have not set up a root account, if this is the case, refer to this guide. This requires the root password.
diskutil list
List the available disks. The memory stick should be listed. Take note of the location.
diskutil unmountDisk /dev/disk2
Unmounts the volumes on the target disk. Remember to replace the example location.
dd if=insertFreeBSDImage.img of=/dev/disk2 bs=1m
Replace [insertFreeBSDImage.img] with the file name that was downloaded from the FreeBSD website, this can also be done by dragging the file from your file searching app to the Terminal. The command copies the image to the memory stick. This will take a few minutes so sit back and grab a snack. Remember to replace the example location.
diskutil eject /dev/disk2
Ejects the memory stick.
Step 3: Booting the Raspberry Pi
Insert the now-configured SD or Micro SD card into the SD card reader on the Raspberry Pi. The card will only be able to be inserted in one direction.
Connect the USB keyboard, monitor, and power source to the Raspberry Pi. Connect the power source last to avoid booting problems.
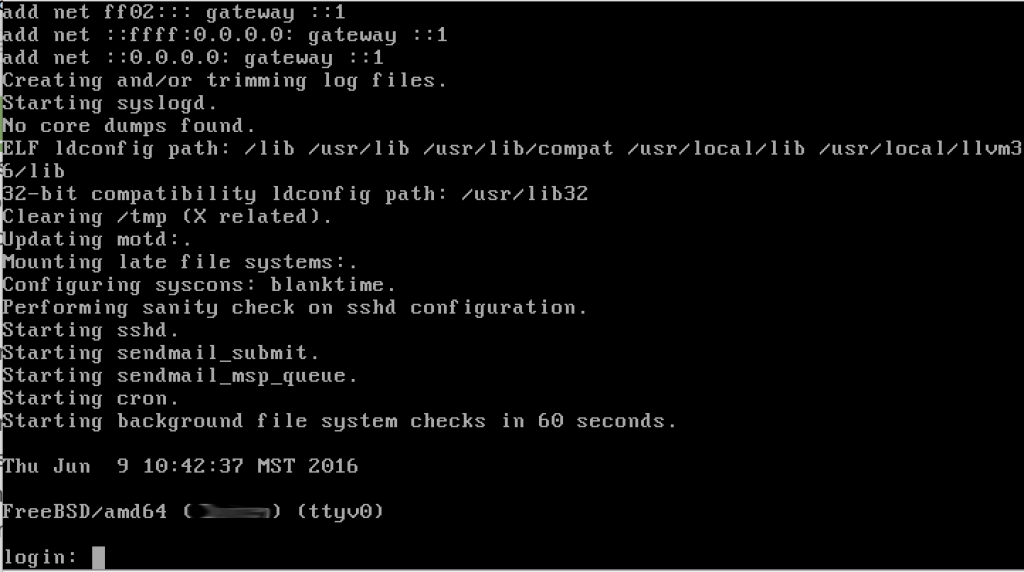
Once the power source has been connected to the Raspberry Pi, the boot process will start. The USB keyboard can be used to enter commands into the shell that will be displayed on the monitor.
FreeBSD will need to be formatted after installation.
Step 4. Post Installation Configuration:
The FreeBSD booting system will automatically start once the device has been correctly configured to boot from the FreeBSD image. A guide to the next process can be found here. Sections 2.8-2.8.5 provide a step-by-step guide on how to configure the FreeBSD system. When in doubt, the default options should be used. These options can be reconfigured later if needed.