Updated: June 15, 2022
1.1 Identifying Your Computer:
macOS:
Start by opening up the terminal, found under Applications > Utilities > Terminal. Then use the code:
sysctl -n machdep.cpu.brand_string

This will return a string identifying the computer’s processor. Running a web search for this processor will take you to the manufacturers website, which should list the processor’s stats as well as whether it is 32-bit or 64-bit.
Windows:
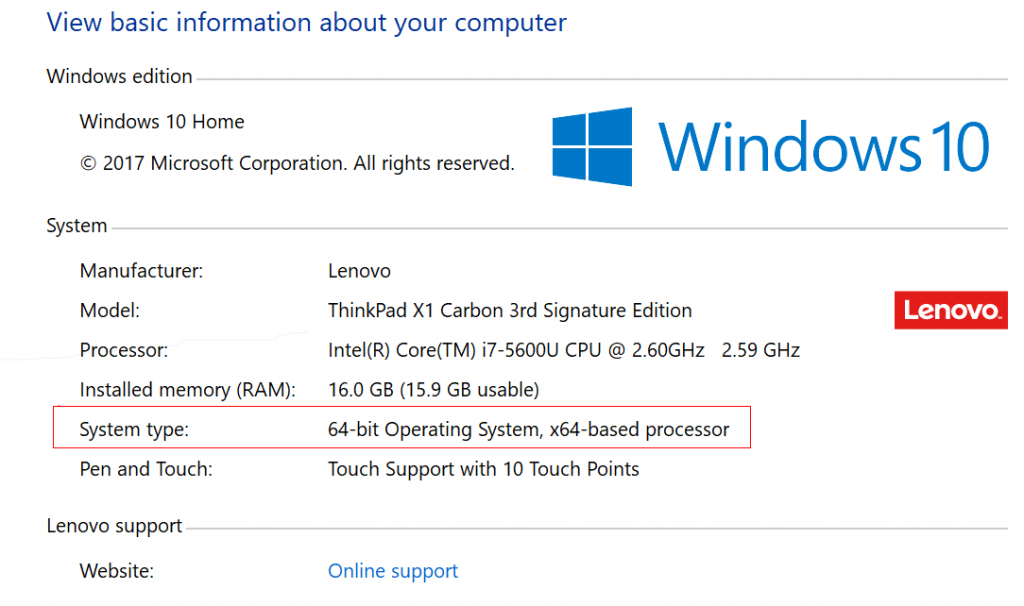
Navigate to “Control Panel → System and Security → System” and look for the highlighted information to determine whether your system is 32-bit or 64-bit.
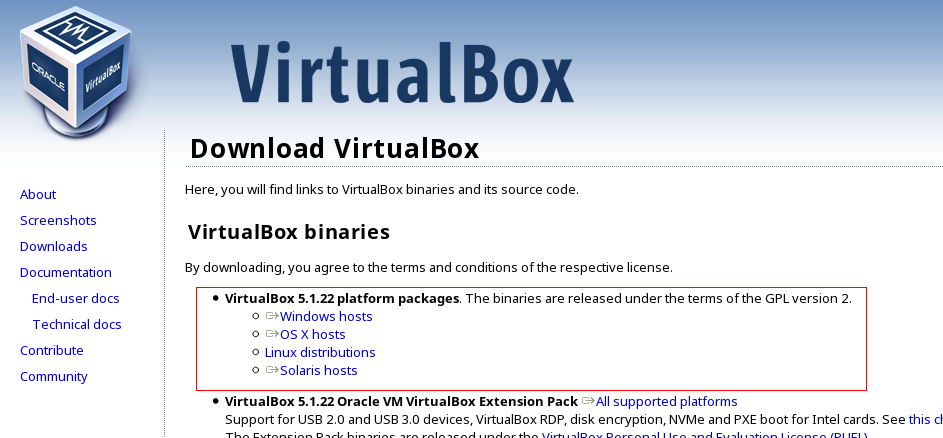
1.2 Installing VirtualBox
Visit the VirtualBox downloads website, and in the highlighted area, select the platform package binary that applies to your operating system. VirtualBox is available on Windows, macOS, Linux, and Solaris.
Opening the downloaded file will start the installation walkthrough. Once it finishes, you’ll be able to launch the application.
1.3 Getting the latest FreeBSD release:
Downloading FreeBSD
Visit the official FreeBSD releases page. The disk images are listed in order of release date, so the most recent release can be found at the top of the page as highlighted.
- For 32-bit machines, click on i386
- For 64-bit machines, click on amd64
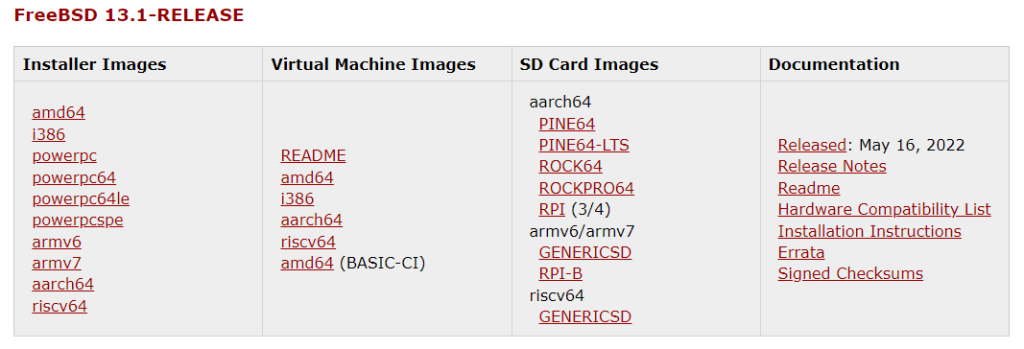
After clicking the link, you will be redirected to a file directory containing multiple formats and versions of the FreeBSD installer.
Identifying the Correct Disk Image
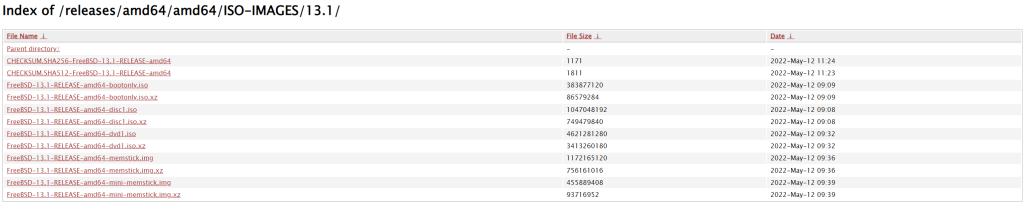
For Virtual Machines, the format you are looking for is the file ending in -disk.iso as shown above. Click this file and it will start downloading the installer.
1.4 Configuring and Starting FreeBSD on VirtualBox:
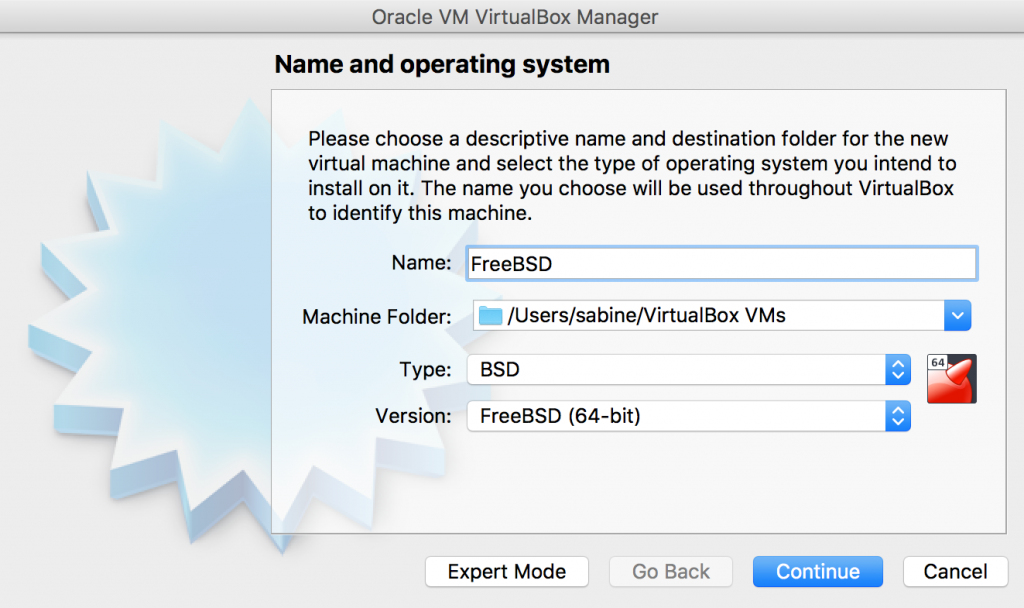
Once the FreeBSD installer has been downloaded in the last step, run VirtualBox to start hard disk configuration. Select the “New” button on the top left of the window to open the configuration window.
Name your operating system as “FreeBSD”, then select FreeBSD from the dropdown menu as well as the version (32 or 64 bit).
Choose the defaults options for disc setup until you reach the memory allocation section
- Pick 2-4GB memory (as long as the slider does not move into the red)
- Hardware drive Option – Recommend 100GB at least 20GB
- Give the VM some extra processors if your machine can handle it (stay in the green)
After the hard disk has been configured, boot up the operating system with the “Start” button. VirtualBox will start up a virtual machine and ask for a virtual optical disk file. This will be the .iso file that you downloaded through the FreeBSD website. Navigate to this file by clicking the small file symbol next to the drop-down menu. Once selected, the booting process will continue and the FreeBSD installer will start.
1.5 Installing FreeBSD:
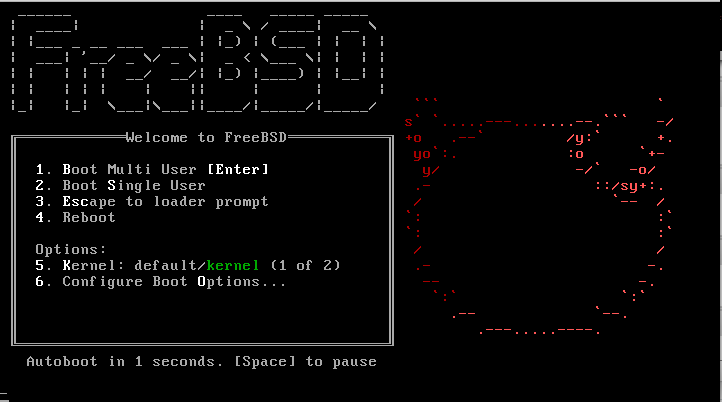
The FreeBSD booting system will automatically start once VirtualBox starts the virtual machine. While this how-to will provide a detailed installation guide, the FreeBSD handbook’s installation guide can also be used. When in doubt, use the default options provided, as they can be reconfigured later if necessary.
- After the first boot, users will be directed to the welcome menu. Arrow keys can be used to navigate through the options while the Enter key will be used to save the selection and move onto the next menu. To begin installation, select the first [ Install ] option.
- This will enter bdsinstall, a program that allows users to install FreeBSD while offering multiple options for customization. For now, default options will be all that’s needed. The options are a great tool for more advanced users wanting a more personalized experience.
- First, the installer will display a menu for keymap selection. Highlight the option to continue with the default keymap and press Enter to use the default keyboard layout.
- The installer will then allow the user to set a hostname for the system. Type in a hostname that is unique for your network. Hit Enter again to save the new name.
- After a hostname is selected and saved, the installer will prompt the user to select components to install. Stick with the default options and hit Enter to continue.
- The installer will guide the user through the process of allocating disk space. This will allow FreeBSD to set up a partition scheme.
- Choose the Auto (UFS) Guided Disk Setup.
- Confirm your selection.
- Use the Entire disk (ada0), this will make sure that all allocation disk space will be utilized.
- Select GPT Partitions when prompted for a partition scheme. To navigate, use the arrow keys and Space to select the GPT option.
- When prompted, complete the setup process and create the disk partition by selecting [ Finish ] and [ Commit ]. Once these changes have been saved and committed, bsdinstall will start the FreeBSD installation process. This may take a few minutes.
1.6 Post- Installation Setup
While the FreeBSD installation process has been completed, there a few more configuration options that need to be set before booting into the newly installed system.
- First, the root password must be set. The root account is a superuser that has access to all files and commands. Characters that are typed during this section will not be displayed on the screen. Type the new root password and then a second time when prompted.
- Next, FreeBSD will need to configure the network interfaces found on the computer. Select Enter to continue. The default options should be used.
- Select [ Yes ] to configure IPv4
- Select [ Yes ] to use DHCP to configure
- Select [ Yes ] to configure IPv6
- Select [ Yes ] to try SLAAC
- At this point you will be directed to a menu with Resolver Configuration values, hit Enter to continue to the next step.
- The next menu is a large list of regions for time zone configuration. Use the arrow keys to navigate to the correct region and hit Enter. Next, navigate to the correct country or region. Finally, identify and choose the correct time zone. Select [ Yes] to confirm.
- A menu to set the correct date will be next, while you can navigate through the menu to set date, choose [ Skip ] if the displayed date is already correct. [ Skip ] the next menu as the time zone was set up in the previous configuration menu.
- The next two menus will be to configure what system services will be started when the system boots. All services are optional and for now select [ OK ] in both menus to continue with the default configuration.
- The next step will be to add a user besides root. Because root has no limits and protection, it is recommended to log in to the system using a user account to limit the damage if a mistake is made (even a typo could be catastrophic).
- When prompted to create a user account select [ Yes ]. Bsdinstall will follow with a series of prompts to customize the account. Below is a quick summary of the information to input. For clarity, text in bold notates when the user should input text and not just use the default option:
- Username – username used to log in. Username is case sensitive and should not contain spaces
- Full name – The user’s full name
- Uid – user ID (leave this blank)
- Login group – The user’s group (leave blank)
- Invite user into other groups? – Additional groups for the user. Type: wheel operator video here, which will assign the user to the wheel (admin), operator, and video groups.
- Login Class – (leave blank)
- Shell – (leave blank)
- Home directory – The user’s home directory (leave blank)
- Home directory permissions – Permissions on the user’s home directory (leave blank)
- Use password-based authentication? – Prompts user to input password at logic (leave blank)
- Use an empty password? – Option to use a blank password, though this is insecure (leave blank)
- Use a random password? – Option for a randomized password (leave blank)
- Enter password – The password for this user. Characters typed will not show on screen.
- Enter password again – The password must be typed again for verification.
- Lock out the account after creation? – Option to lock out use (leave blank)
- User will be prompted to review the summary. If a mistake was made enter no and try again. If everything is correct, enter yes to finalize and create the new user. The menu will then ask if the user wants to create further user accounts, for now enter no.
- Final configuration: Use the arrow keys to navigate to Handbook and press Enter to install the FreeBSD Handbook. Select [ Ok ] to begin installation.
- Navigate to Exit and hit Enter to finalize changes. Select [ No ] when asked if further manual configuration is required and [ Reboot ] to complete the FreeBSD installation process.
1.7 Saving Your Configuration:
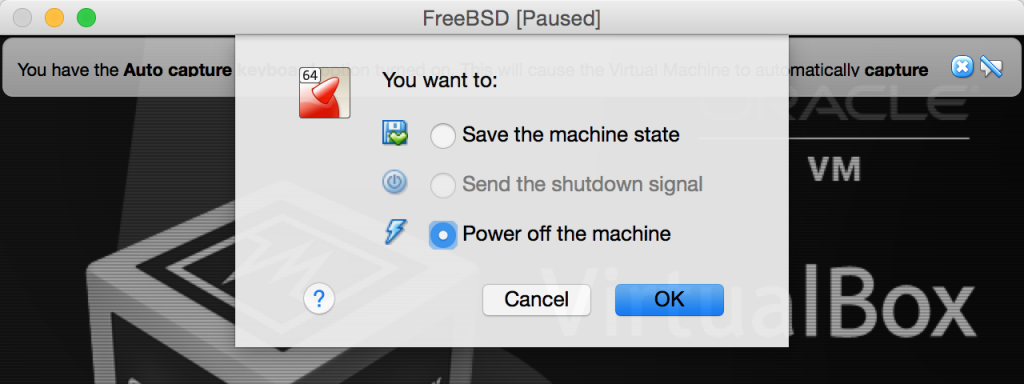
Once FreeBSD has been properly configured, a window will appear asking to reboot. Select “yes” and wait until the FreeBSD booting page appears again. Once this happens, manually close the virtual machine window and select “Power off the machine”.
1.8 Removing the Installation Disk:
On the main VirtualBox application, click the the section (on the lower right side of the window) that says “Storage”. A new window should appear showing the storage options.
Under the main “Controller: IDE” there will be two options. One will be the hard disk that VirtualBox created for the system (it will have a square blue hard drive icon) and the other is the original FreeBSD download (with a light blue disk icon). Right click the sub-storage with the disk icon and select “Remove” from the drop-down menu.
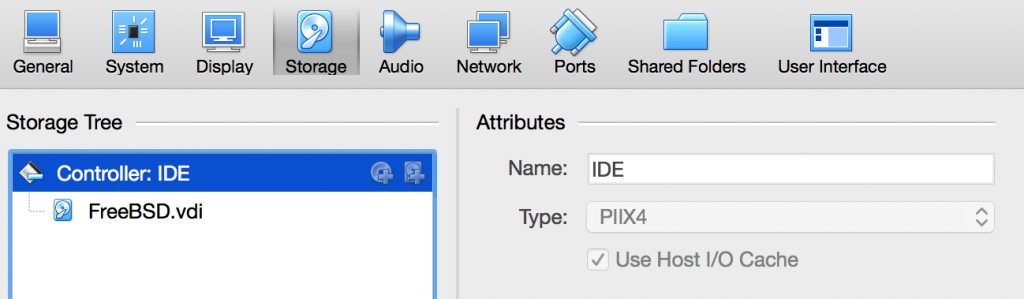
Once it is removed, the window should resemble the one pictured above.
1.9 Cloning a VirtualBox VM
Use the Snapshots menu in VirtualBox to Clone the VM. Check the box “Reinitialize the MAC address of all network cards”. We could choose either a Full clone or a Linked clone. We’ll use the Full clone option. Later on in the installfest we’ll use this cloned VM.
1.10 Final Configurations:
Click “Start” with the original VM selected, and the FreeBSD virtual machine should now boot in its configured form. In order to download packages you need to be logged into, or emulate the root user. After logging into the previously created user, enter the following command in the terminal:
$ su
Install the VirtualBox guest addition packages, and configure the startup service configuration:
$ pkg install emulators/virtualbox-ose-additions
$ sysrc vboxguest_enable=YES
$ sysrc vboxservice_enable=YES
sysrc is a pre-packaged command that allows rc.conf (system configuration to be read on boot) to be edited from the command line, without using a text editor.
1.11 GUI (Desktop) Prep

Before installing a desktop environment, a graphical user interface (GUI) is needed. The X Window System is an open source GUI that supports FreeBSD and offers a ton of customization and user tools.
To install the Xorg binary package and configure the X Window System:
$ pkg install -y xorg
$ ee /boot/loader.conf
ee(1) is the first text editor we will be using, the following line can be added simply by typing it:
kern.vty=vt
Escape and then hit Enter twice to save changes and exit the ee(1) editor:
$ ee /usr/local/etc/X11/xorg.conf.d/driver-vboxvideo.conf
Use the same method above and add the following content to the new file:
Section “Device”
Identifier "Card0"
Driver "vboxvideo"
EndSection
Enter the following commands:
$ sysrc dbus_enable=YES
$ sysrc hald_enable=YES
$ dbus-uuidgen > /etc/machine-id
$ pkg install -y sudo
$ visudo
(we will use another text editor, the vi editor, to edit sudo )
Within the sudo config type /wheel press Enter and uncomment the line below to allow all members of the wheel group to use sudo (in vi you can type the following to accomplish this task: j0xxZZ) ( pressing j moves down, 0 moves to the beginning of a line, x deletes one character, ZZ is saves and quits)
$ reboot
The Guide Continues in Part II!
The next part will include installing a desktop environment, updating FreeBSD, setting up a FreeBSD jail, as well as using Ansible and Poudriere.