1. Installing VMware Fusion:
VMware’s desktop products, recently made available by Broadcom as a free download for personal use, run on a wide range of systems; VMware Fusion is designed for Mac systems and can run on M-Series Apple Silicon systems, whereas VMware Workstation is a similar hypervisor that runs on Windows and Linux.
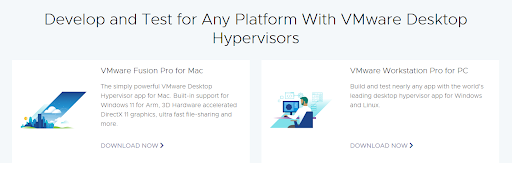
Users must first register on the Broadcom support portal to install VMware Fusion or VMware Workstation. This signup process includes being included in Broadcom’s marketing lists, and free access to the hypervisors is granted for personal use.
Once registered, follow the install links on VMware’s website, log in using your Broadcom sign-in, and install the correct hypervisor for your system.
2. Getting the latest FreeBSD release:
Visit the official FreeBSD releases page. The disk images are listed in order of release date, so the most recent release can be found at the top of the page as highlighted.
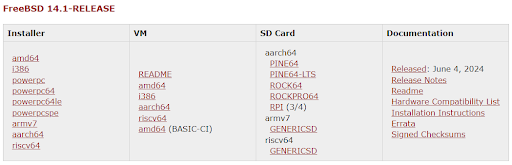
- Newer m1/m2 Apple chips will require aarch64 images
- 64-bit Windows machines will require amd64 images
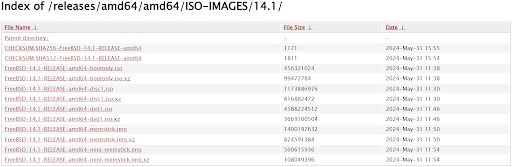
After clicking the link, you will be redirected to a file directory containing multiple formats and versions of the FreeBSD installer.
Identifying the Correct Disk Image
For VMware, the correct format will be the image ending in -disc.iso, as shown above. Click this file and start downloading the image
3. Creating a FreeBSD Virtual Machine:
3.1 VMware Fusion (Mac):
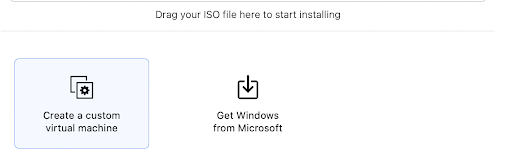
In VMware Fusion, click the ‘+’ symbol in the top left or center of the client, then click ‘New’ to create a new virtual machine. On Mac, choose ‘Create a custom virtual machine,’ select ‘Other’ as the Operating System, and ‘FreeBSD 14 64-bit’ as the firmware.
Select ‘Create a new virtual disk’ and ‘Continue.’ Then, finish and save the VM using your own naming convention.
Before booting, the new virtual machine must be given a CD drive to boot from, or it will fail to boot. Open it to see this message, and do not suspend it; it must be running to attach a drive.
Press command+E to open virtual machine settings and click CD/DVD. Choose the FreeBSD ISO image, the “FreeBSD … disc1.iso” image downloaded earlier. Then, check the box to connect a CD/DVD drive.
Right-click “virtual machine” in the top menu, and select “restart.”
3.2 VMware Workstation (Windows/Linux:
In the center of the client, click ‘Create a New Virtual Machine’ and choose the ‘Typical’ virtual machine option. Choose the FreeBSD ISO image, the “FreeBSD … disc1.iso” image downloaded earlier.
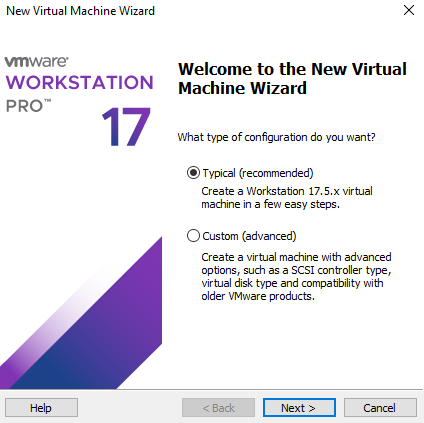
Name the virtual machine using your own naming convention, and ‘Finish’ to create the VM.
4. Booting into FreeBSD:
The FreeBSD booting system will automatically start once VirtualBox starts the virtual machine. Follow the FreeBSD Handbook’s installation guide to configure and set up your system. When in doubt, use the default options provided, which can be reconfigured later.
Once installation is complete, use the FreeBSD Handbook’s post-installation guide.

5. Finishing Up:
On a bare-metal system, you would now be able to boot directly into FreeBSD with no further configuration. However, since we’re using a virtual machine, a few more steps are required.
Open settings. Click on CD/DVD, and then Un-check the box that says “connect CD/DVD Drive” or “connect on boot”. Exit out of this screen.
Next, click on Processors and Memory and select more RAM and cores. The default options are quite low for a dedicated virtual machine.
Use the Start button to boot the virtual machine, and log in to the root user (or use ‘su’ if the guest user was given admin control)
To ensure full VMware support, install the open-vm-tools package with:
pkg install -y open-vm-tools
If this is the first time pkg has been run, respond to the prompt with y to bootstrap pkg. The open-vm-tools package contains the core user space utilities, application programs, and libraries, including vmtoolsd, to help effectively manage communication between your host and guest OSs.