Updated: June 3, 2021
This how-to guide is for anyone who has installed and configured FreeBSD on their machine but is looking for the next step. The walkthrough will guide users through setting up a desktop environment as well as installing various software that can be useful to new users.
1. GUI (Desktop) Prep

Before installing a desktop environment, a graphical user interface (GUI) is needed. The X Window System is an open source GUI that supports FreeBSD and offers a ton of customization and user tools.
To install the Xorg binary package and configure the X Window System:
$ pkg install -y xorg
$ startx
$ ee /boot/loader.conf
Add the following line to the end:
kern.vty=vt
Enter the following commands:
$ sysrc dbus_enable=YES
$ dbus-uuidgen > /etc/machine-id
$ pkg install -y sudo
$ visudo
(we will use the vi editor to edit sudo )
Within the sudo config type /wheel press Enter and uncomment the line below to allow all members of the wheel group to use sudo (in vi you can type the following to accomplish this task: j0xxZZ) ( pressing j moves down, 0 moves to the beginning of a line, x deletes one character, ZZ is saves and quits)
$ reboot
(you can also type init 6 to reboot)
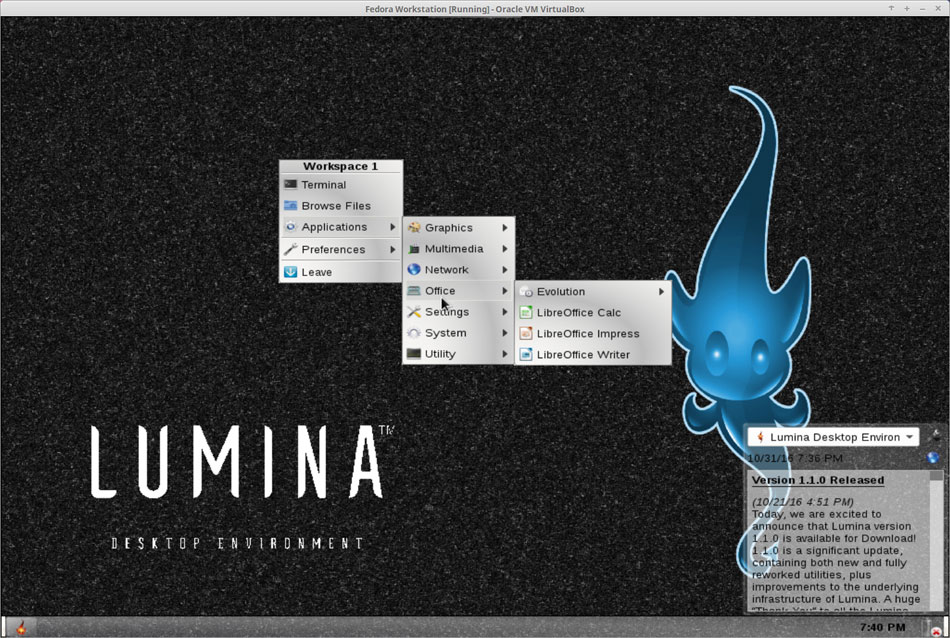
2. Installing and Configuring a GUI (Lumina Desktop Environment)
As regular user run the following:
$ sudo pkg install -y lumina
$ vi .xinitrc
Within the .xinitrc file type i to enter insert mode then add the following line:
exec start-lumina-desktop
To exit and save changes type ESC then type two capital Z’s or you can also type :wq
$ startx
Right click on desktop, Mouse over Preferences, Click on All Desktop Settings, click on General Options, in the Time Format field type the following
h:mm:ss A
This will change the clock to 12-hour format. If you don’t want the seconds displayed remove the :ss
Next, set up a media server: Open a terminal (alt-F1) and run:
$ sudo pkg install -y plexmediaserver
$ sudo sysrc plexmediaserver_enable=YES
$ sudo service plexmediaserver start
4. Installing A Browser

A variety of browsers have been ported for FreeBSD, for the sake of clarity this guide will only cover the installation of the Firefox browser. Other options can be found in the FreeBSD ports tree. Here’s a handy section of the handbook covering browser installation.
First, install Firefox:
$ sudo pkg install -y firefox
Next, let’s enable the media server. Click on the Lumina icon in the bottom left either type firefox + Enter or mouse over applications > Internet > click on Firefox
Open firefox to http://localhost:32400/web
Sign up with either a Google, Facebook, or Email account
Follow the wizard and give your new media server a name, uncheck the box ‘Allow me to access my media from outside my home’, click Next, we can organize media later click Next, click Done.
5. Installing an Office Suite
A wide collection of office suits and word processors are available on FreeBSD. This guide will focus on the installation of LibreOffice. More options can be explored here.
The first step is to install and configure libreoffice:
$ pkg install -y libreoffice
Open libreoffice in Lumina
Open up a new document and start editing
Let’s test the media server we installed earlier using Lumina. You can use the “+ Add Library” button to add media libraries. For example, if I wanted to add a music library I could put some awesome music in my home directory (~/Music) then click the “+ Add Library” link, select the type Music, name it Music click Next, click “Browse For Media Folder” button and select the Music folder
6. Installing a Document Viewer
While an office suite will allow you to view and edit a large collection of document types, many newer formats may still be unsupported. In order to be able to view all these formats, a universal document viewer such as Okulus may prove helpful.
To install Okular as a package:
# pkg install okular
Open Firefox once again and navigate to: http://ftp.freebsd.org/pub/FreeBSD/doc/handbook/book.pdf
In the dropdown menu under “file” select “save as” and choose a file designation to save the PDF to.
Navigate back to the lumina browser desktop, right click to bring up the drop down menu and select “browse files” select the PDF that you just installed and open it with the Okular viewer.
You did it!
Following this how-to should help new users install a desktop environment, the X Window Server, and a few basics applications that will expand the capabilities of your FreeBSD machine. However, this guide only scratches the surface of all the applications that are available for the FreeBSD operating system. The next step will outline the easiest way to move forward and find other applications to help customize your machine!
Finding Other Applications/Tools
- First, navigate the the FreeBSD Ports Collection, a massive list of all available application for the FreeBSD Operating System.
- Explore the categories that interest you and find some applications you want to try to install on your machine. The possibilities are nearly endless with tons of tools, utilities, games, file editors, and many more categories!
- While this guide gives a brief introduction to installing packages, to continue forward with FreeBSD you should check out this brief guide on Installing Ports on FreeBSD. While installing packages (as we did earlier in this guide) can be faster, compiling an application from the ports collection gives users far more control over the process.
- Play around with installing new applications until you feel comfortable installing from binary packages as well as compiling from the ports collection.