Updated: December 1, 2019
This page will serve as a guide to setting up a basic Minecraft server on FreeBSD.
Step 1: Choosing the Device
Before setting up the server, choose between setting up a dedicated device or a virtual machine running FreeBSD.
- A dedicated server will be much more dependable but requires a device completely dedicated to running the server. This option is great if looking for a server with full-time dependability.
- Running the server on a virtual machine will allow the user to run a server without a dedicated device as well as giving the user more control over when the server is running.
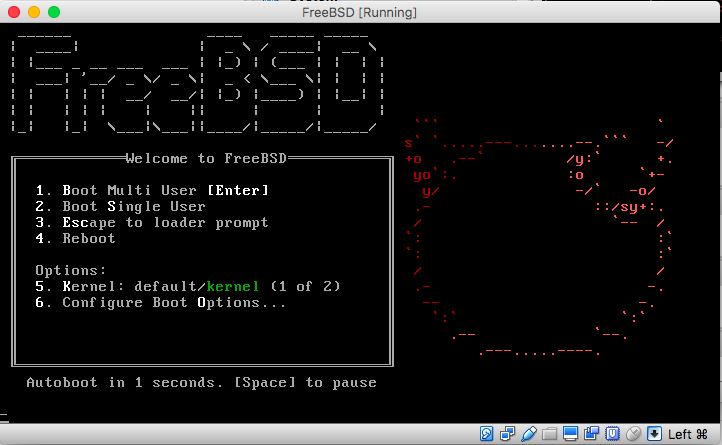
If the device or virtual machine is already running FreeBSD, continue to the next step. Otherwise, consider one of the Foundation’s guides to get set up with FreeBSD
Step 2: Using the Ports Collection

All commands in this section should be run as root, using the “su” command will also work. To download a compressed snapshot of the Ports Collection into /var/db/portsnap:
# portsnap fetch
When running Portsnap for the first time, extract the snapshot into /usr/ports:
# portsnap extract
After the first use of Portsnap has been completed, as shown above, /usr/ports can be updated as needed by running:
# portsnap fetch update
Step 3: The minecraft-server Port
The FreeBSD ports collection has a wide variety of gaming ports available, including a great option for running a basic Minecraft server: the minecraft-server port.

The first step will be to install the port, now that the ports collection has been added, this can be done simply with the command:
# cd /usr/ports/games/minecraft-server/ && make install clean
To populate the necessary files, the user will need to execute the program with the command:
# minecraft-server
Next, the user will need to agree to the Minecraft End User License Agreement (EULA). This can be done by using the vi command. The following command will bring up the vi text editor:
# vi /usr/local/etc/minecraft-server/eula.txt
Using the editor (use the manual page if unfamiliar with the editor) change the 4th line to read:
eula=true
The server can then be run with the command:
# minecraft-server
To stop the server:
# stop
Step 4: Identify The External IP Address
To connect to the Minecraft server over the internet, the user will need the external IP of the device as well as configure the router’s port forwarding. This process will be different for every single type of router so this guide provides a few links to make this easier.
First, identify the external IP of the device. A super easy way of doing this is using the wget(1) command:
# pkg install wget
proceed through the installation, typing ‘y’ when prompted. Next, use wget(1) to pull the IP address from a website that will identify the device’s external IP.
# wget -qO - http://wtfismyip.com/text
This should return an IP that looks similar to “65.214.224.57”, however, each set of numbers will be different. This is the external IP address. Other devices will need this string to connect to the Minecraft server.
Step 5: Port Forwarding
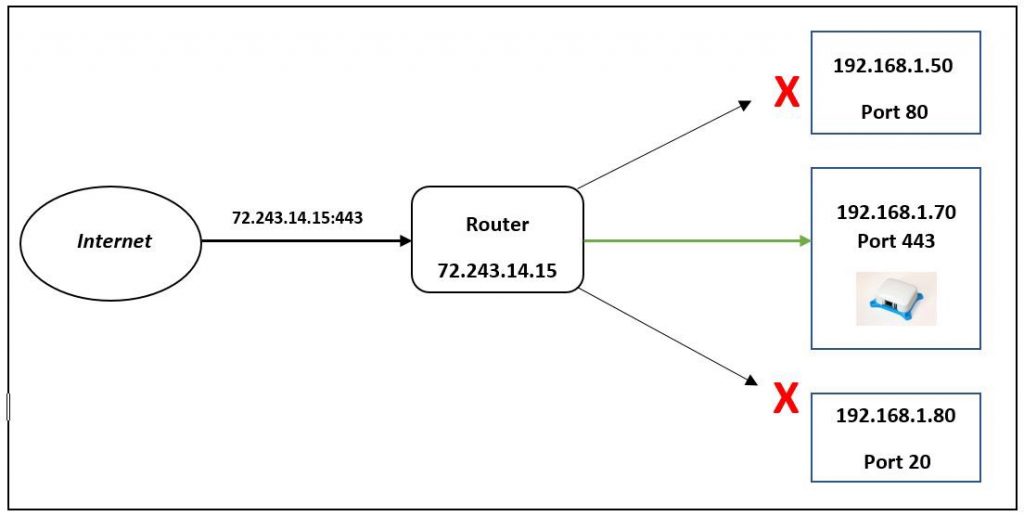
The next step is to make sure that the router connected to the device is properly forwarding all Minecraft traffic to the device. Even if there are no other computers on the network, this is a required step. Minecraft uses port 25565, so the router needs to be set up to send any traffic on port 25565 to the computer that has the Minecraft server. Router set-up will have to be done in a separate computer with a desktop environment set up.
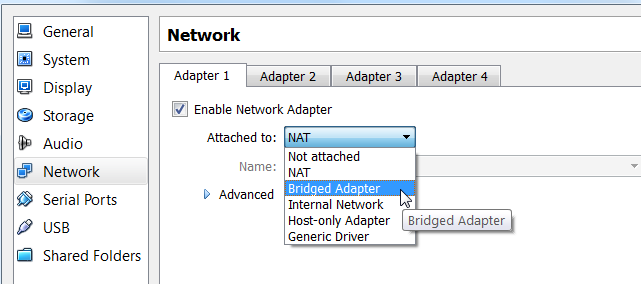
Only do this step if on a virtual machine: Many virtual machines will have the same IP adress as the host computer but will receive none of the incoming traffic. To remedy this, a bridged network adapter will need to be used. This can be changed by opening the virtual machine’s network settings and switching the network adapter from NAT to bridged. This will give the virtual machine it’s own unique IP address that can be used to forward traffic. It is important to use this and not the host computer’s IP address in the next few steps, as traffic will not be correctly forwarded to the Minecraft server.
During setup, the router will have to identify the correct device to forward traffic to, while many routers will list the devices and the internal IP (different than the one found in step 4), this may not be the case. This IP should resemble 192.168.1.176 and is the number assigned to the device by the router. The command to identify this IP on the device is:
$ ifconfig
Each router will have a unique set-up process for port forwarding. Visit portforward.com and select the router model (usually listed on the back of the router). If an ad appears , click CLOSE, the application being advertised is not needed.
The next page will have a guide to set-up port forwarding on that model of router, while each router is different, the important ports to forward to the device are listed below:
TCP: 25565
UDP: 19132-19133,25565
The external and local IP addresses may change when the device is shut down or the modem is reset. Each time the server is restarted, check that these have not changed and update the settings as required.
Step 6: Connecting to the Server
Now that the server has been set up, any Minecraft client should be able to connect with the external IP address found in step 4. First, ensure that the server is running on the host device or VM with the command:
# minecraft-server
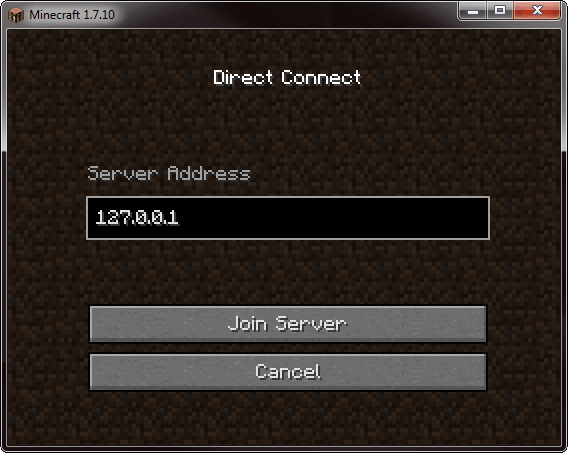
Next, boot up the Minecraft client on the computer that will be connecting to the server, click Multiplayer and then Direct Connect, the client will then ask for the server address. This is the external IP found on step 4 of this guide. Clicking Join Server will then start the game session.
Once you have started playing on the server you can play around with server commands, these will be entered in the terminal on the device running the server and can be used to manipulate the game world, game rules, and players allowed on the server.